The delivery has arrived. How do you create a goods receipt that reflects what was actually received? In ERP Core, select the product and stock location, check existing inventory and enter the received quantities.
 A practical example: 100 bottles on the delivery document, 98 received
The operator counts 98 bottles of water although the supplier document shows 100. Resolve the discrepancy before finalising the receipt and follow your company’s procedure. This example uses demonstration data: do not enter 100 merely to make the numbers match.
1. Open the receipt and find the product
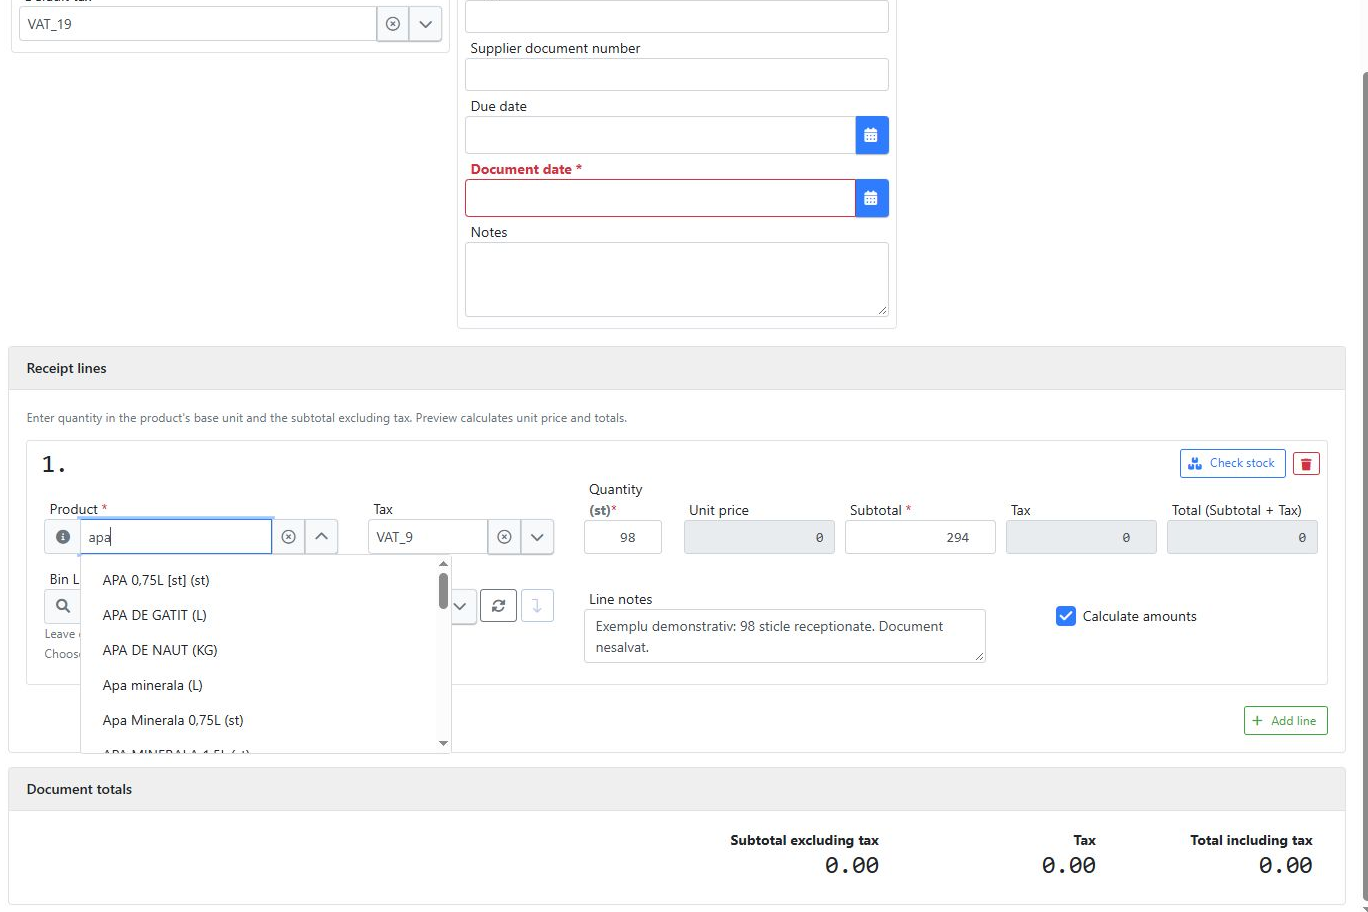
From Goods Receipts, create a document and add a line. Enter part of the product name, such as “apa”, then select the correct variant. Check the size and unit of measure: a 0.75-litre bottle is not the same product as a 0.5-litre bottle.
2. Check current inventory before receiving
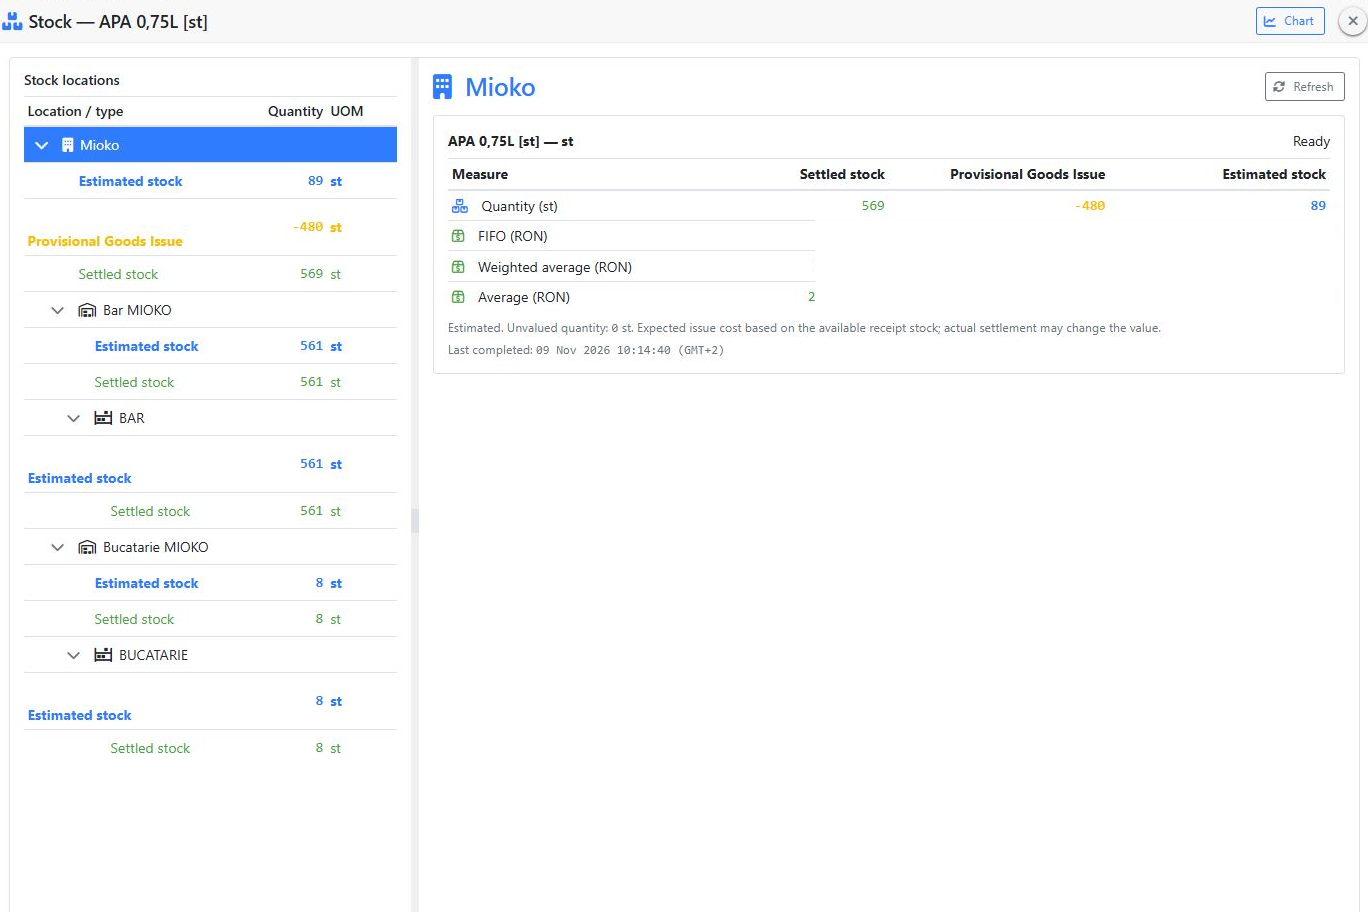
Open the product’s stock details. Compare locations and distinguish settled inventory from provisional issues. In this demonstration, 569 settled units and −480 units in provisional issues result in an estimated stock of 89. This estimate is not a physical stock count.
3. Enter the quantity actually received
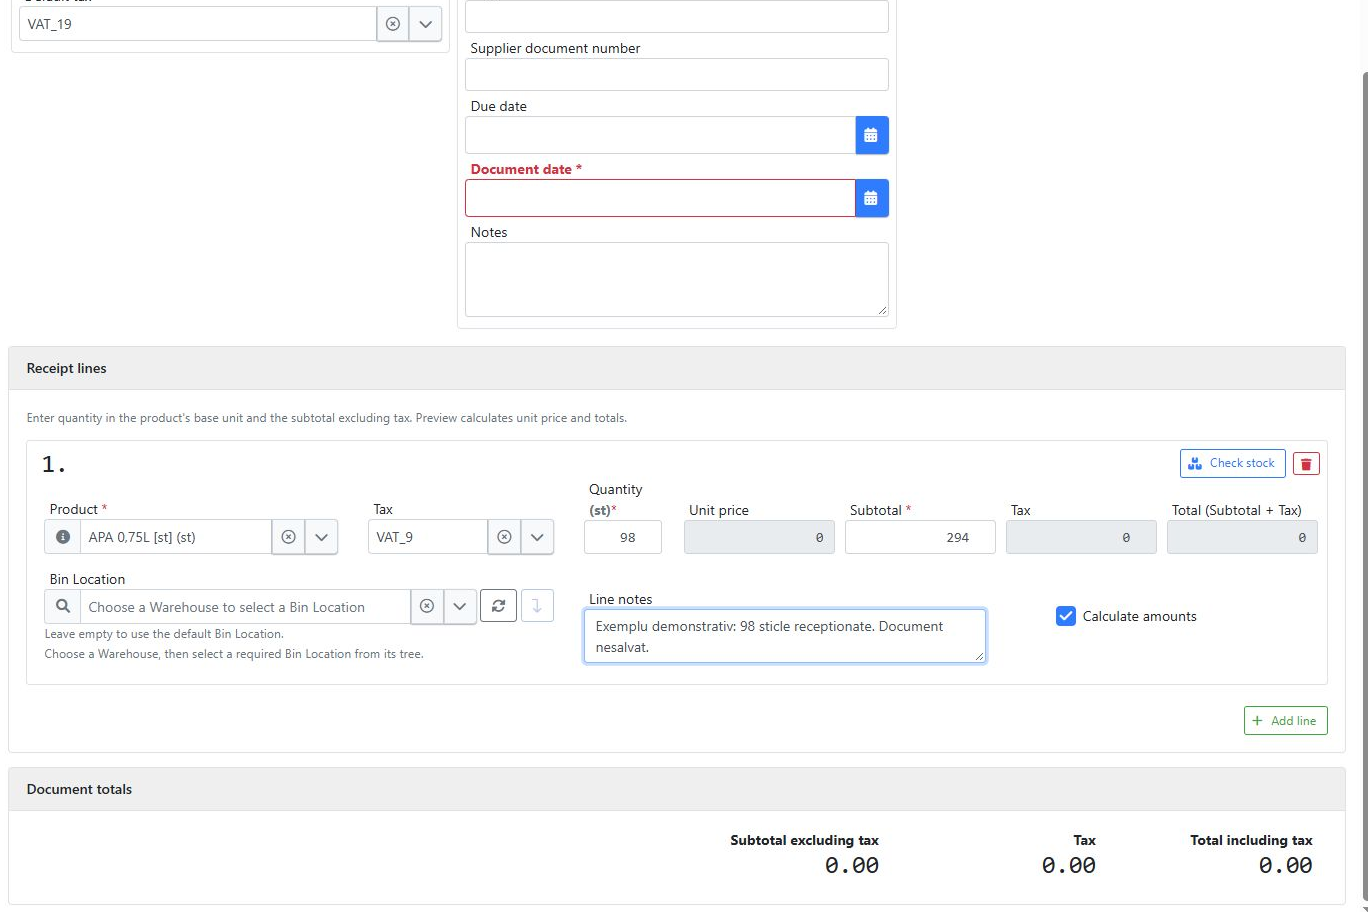
In this example, enter 98 as the quantity and 294 as the subtotal, using the product’s unit. Record the delivery discrepancy if your procedure requires it. Complete the supplier, stock location and document details, then verify the applicable taxes.
4. Validate, review totals and save
Run validation and resolve the form’s messages. Compare the subtotal, taxes and total with the documents and the goods received. Finalise the operation only after these checks, following your company’s workflow. Find the document in the list and check its effect on inventory.
Before you finish
- Are the product, variant, packaging and unit correct?
- Have the received goods been counted and discrepancies resolved?
- Are the supplier, document and stock location correct?
- Have taxes and totals been reviewed after validation?
Who uses this workflow?
Retailers, distributors, warehouses, workshops and restaurants receiving goods or raw materials. A clear goods receipt helps the team explain where inventory came from without piecing the delivery together from messages and separate spreadsheets.
Continue with inventory checks and movement charts.